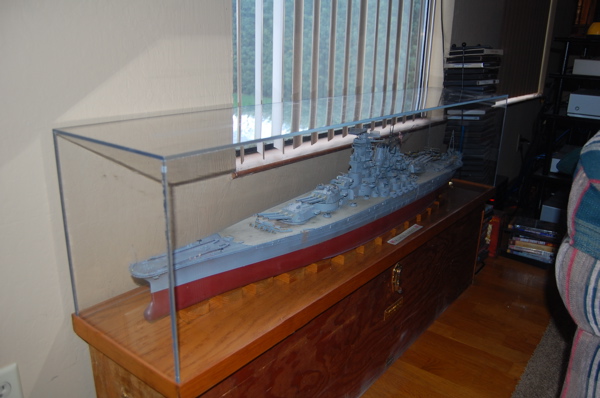
Dust gets on everything – including models, and it’s difficult to remove. If you don’t have a large display case to house all of your models you may want to consider building separate display cases for them. I have built 4 of them now and will describe the process. It’s not difficult and not that expensive. The largest one I’ve built was for my Yamato that is 55 x 11 x 13 inches high. It’s heavy and the acrylic is ¼ inch thick. When I take this off I have to be careful because of it’s size.
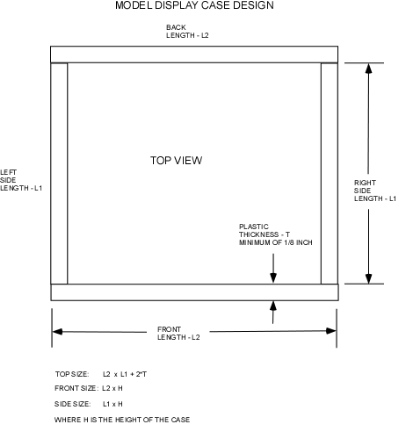
I get my case material from a place called Tap Plastics. It’s clear acrylic and holds up nicely but can be easily scratched so you need to be careful in that regard. Below is a drawing that shows how I measure up the sides and top.
Be sure and allow for wall thickness when you make up your list of materials for the plastic cutter. Also allow sufficient height – I always allow a few inches above the top of the model so it doesn’t look so cramped in the case.
When you pick up your case parts they will have plastic on the sides. This is to protect the acrylic from scratching. I use IPS Weldon #3 to glue the parts together:
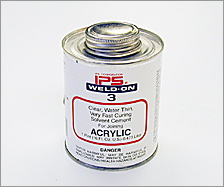
You can get this at the same place you got the plastic cut (hopefully). I got mine several years ago at Tap Plastics.
Be sure and have good ventilation when you use this glue – you only have one body and you need to take care of it. So open a window or two.
To assemble the case I follow these steps.
- Peel back the protective plastic from the part edges that will be glued. Trim this plastic off using an x-acto knife with a new blade. Be careful not to scratch the plastic.
- Carefully sand down the edges if they are at all rough. If you are building a larger case with a thickness of ¼ inch or greater – you should probably have the edges polished. That will make for a much nicer finished case. The minimum case thickness is 1/8 inch. Any thinner and you will get chipping on the cut edges and the case will end up flimsy. Believe me – I’ve tried this and it doesn’t work.
- Cut narrow strips of painters blue tape (it doesn’t leave any glue residue). Stick these to the edge of the bench.
- Position the case front and side on a flat surface with the edges together that will be glued. Use 3 strips of blue tape to secure the sides – I put them near the top and bottom about 1 inch away from the ends, and the third piece in the middle. I put the tape on the outside of the case.
- Using a right angle triangle to make sure the corner is at precisely 90 degrees – now you are ready to apply some adhesive.
- Using a medium size paint brush dip it in the adhesive and apply sparingly at the top and bottom and between the tape areas. The glue is very viscous – like water so you don’t want to get it near the tape – the glue will wick under the tape and spoil the finish . That’s not a good thing. What you are doing now is just tacking the parts together. Let it dry for a few minutes.
- Now remove the blue tape being sure that you maintain that 90 degree angle. Using that paint brush – apply the glue up and down on the inside of the case along the seam. It will wick into the seam and bond pretty quickly.Repeat the above steps for the other three corners. If you are building a large case you will probably need someone to help you position the parts and hold things steady.
- Finally when the walls are done stick 12 strips of blue tape on the top piece around the edges. I put 3 pieces on each side away from the corners and in the middle. Now put the case top on the table then put the walls on top so the whole case is upside down. Fold the tape up onto the walls to hold the wall in position.
- Now using that paint brush sparingly apply some glue in the areas between the tape strips.
- When the glue is dry (just a few minutes with this stuff) very gingerly lift the case up to remove the tape. Put the case back down – it’s still upside down. Now using the brush apply glue along all of the seams around the top edge.
- When the glue is dry remove all of the protective plastic on all of the acrylic walls and top. Now you are done! One other thing – you may find that the corners are really sharp. I’ve cut myself on them – so be careful. To remove that sharp edge you can draw the sharp edge of your x-acto knife along the edge.
That’s it no more dust – enjoy your case! In the picture below you can see my Accurate Miniatures 1/48 B-25B. It is sitting on a replica deck for the USS Hornet – the ship it took off from on the raid over Tokyo. The deck is made by JUST PLANE STUFF. The base comes from an old stereo cabinet that I cut up – it’s just particle board that I routed around the edge.
