2/21/2013 I've actually started this build on the 12th of February but haven't started the build article till now. I purchased this model at the IPMS nationals last year at Disneyworld. I bought it from Squadron when I noticed they had a special at the show – 30% off. Gotta love that. I also purchased later Roy Sutherlands really nice cockpit stencils as made by his company BARRACUDACALS. I used these when I built the Tamiya 1/32 Spitfire XIIV and loved them. These went on well too as the pictures will show. Here are pictures of the BARRACUDACALS stencils as well as the instructions:


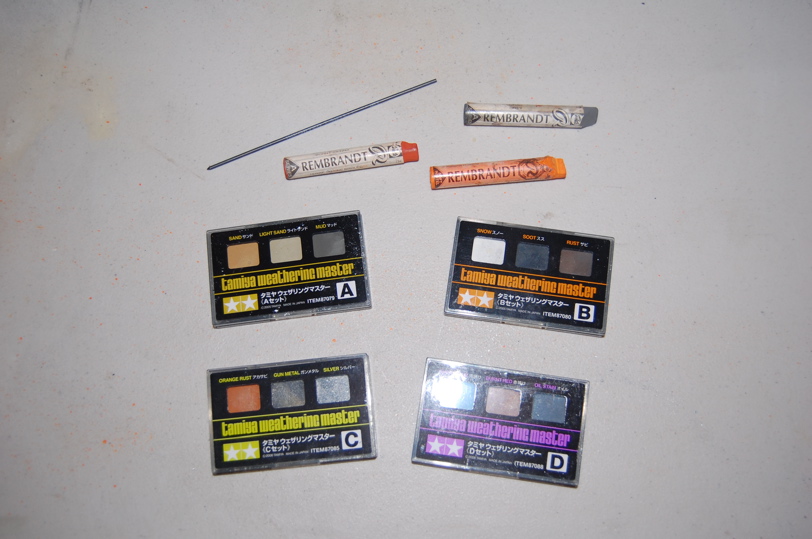
I've also completed the cockpit as the following photos will show. The build is very nice – this is a great kit. I've used ModelMaster metalizer paints for the metal surfaces. I love how nicely they lay down. Very easy to use. I also used the 4 Tamiya Weathering Master kits to add a little weathering.


2/22/2013 I've finished step 20 in the instructions. As you can see I've now closed up the fuselage. This is a very involved and detailed model that won't be finished till step 71. It moves along quite quickly compared to the Arizona because there isn't all of the fiddly photo etch to deal with. There are two very nice frets of photo etch here but you don't have to fold any of it and they are very nice to deal with. On to the pictures:

3/3/2013 I've finished the wings and glued them to the fuselage. I've also assembled a few of the extra bits. One picture shows some of the parts of the cooling vents on the a/c bottom. They have been finished in Alclad II and I really like the finish. I've just received 4 more bottles of the stuff:duraluminum, dark aluminum, white aluminum, and polished aluminum to add to the bottles I already had: airframe aluminum, and aluminum. That should give me a nice wide range of shades to finish the model in. I plan on giving the plane a light coat of Tamiay fine surface primer, then a coat of Model Master black enamel followed by the Alcald II. I will shade various panels in other colors to give some variation. This kit goes together really really well. Just a pleasure to build – it has been a lot of fun so far. Now on to the pictures:


3/6/2013 I've now completed the Alclad II painting. I've added 12 new pictures below. In the first pic you will notice the gloss black undercoat – I used Model Master gloss black enamel and discovered if you spray it on really diluted you can get an extremely shiny surface – notice the lander gear. Also in the first pic is the Tamiya carousal with other bits with their gloss black undercoat…

Next we have the external fuel tanks with their wing fixtures.

In this picture the a/c has been given several light coats of Alclad II airframe aluminum. I had to go over it several times to get a somewhat even coverage.

Here are the external tanks painted in Alclad duraluminum and the m/g covers still in the gloss black…

Here is a closeup of the landing gear painted in airframe aluminum – you can see the high gloss finish.

These next photos show how the Alclad had pealed off when I removed the Tamiya tape which was used to mask off for different shades.


I fixed this using post-it-notes which have really low tackiness. A note on the other shades, they are as follows:
wing panels – dark aluminum
fuselage panels – white aluminum
canopy bottom frame panel – polished aluminum
I've also found that when the Alclad is dry – it will still come off on your hands. I've addressed that by polishing the a/c with a microfiber cloth. That seems to remove the excess dry paint particles. I still may seal the finish but haven't decided what to seal it with.
Here is the result…


3/8/2013 I've finished the blue nose painting as well as sealing the Alclad finish. I used Tamiya paints for the blue and mixed as called out in the instructions. I sealed the model with Future Floor Wax. I discovered that Future really doesn't alter the hue of the finish – at least to my eyes. Now I can handle the model and proceed with the decals. I did not like the final finish on the starboard inner wing panel – there was some lint or other particles caught in the paint. I fixed it by sanding down the finish with really fine sandpaper dipped in water. Then I polished the area with Squadron super finishing stick #30507. I then sprayed the area with very diluted Model Master gloss black enamel followed by a few coats of Alclad. The result was much much better and really worth the few minutes that it took. Here are four pictures showing where I'm at now:


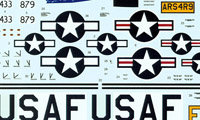
3/12/2013 I've now started applying the decals. It wasn't long before disaster struck. I was applying a stencil just below the cockpit then applied Microscale Sol to it – I accidently moved the stencil with my finger and it ended up on the 352nd fighter group emblem just below the cockpit. I noticed it later, but by this time the Sol and done it's deed and the two decals were melted together. I was able to remove the emblem but in doing so I also destroyed the 6 kills just above the emblem. I looked for a replacement sheet everywhere online but no one was selling one – I also tried the Scale Modeler A/C forum – no dice. I then e-mailed Tamiya America and they very graciously offered to send me the whole decal sheet free of charge. Wow – gotta love Tamiya. I immediately sent them my address and am now waiting. I also replaced the stencil that I moved with another one (not the correct one but I'll fix that when the new decal sheet arrives). Here is a picture of the P-51D without the emblem…

3/14/2013 Well this brings to a close this build – well almost – I still need to apply the two decals I ruined and I may add a little weathering at some time. Here are 5 photos of the "completed" Tamiya 1/32 P-51D.
This first one show a nice size comparison with two other WWII a/c that I've completed. I was going to add the antenna wire that's shown in the Tamiya literature – but I've determined that none of the ETO P-51D's had one – so mine won't either.


3/21/2013 Well – I found out that I needed both decal sheets and Tamiya was just wonderful and sent both sheets to me for free. I got them in about three days. That's what I call customer service!! I must say I love the Tamiya operation – very classy. I've just taken a few pics of the finished model…this has got to be the ultimate P-51D model out there. Just a pleasure to build – no problems anywhere. Well – to be honest – they should make the decals thinner – but they are a mass market company and thicker decals are more robust – so I can understand that too. Here are the pictures: