6-18-08
I purchased this model several years ago and it has been patiently waiting to be built. My brother mentioned that he would love a B-25 model – so here we go.
The B-25B was the a/c model used by the Doolittle Raiders – the raid against Japan. This was a very daring and almost suicide mission to bomb Japan in 1942. It was a great morale booster for our country and a blow to the egos of the Japanese military who said that their country would never be violated. As a young kid I remember reading Ted Lawsons’s book – Thirty Seconds Over Tokyo. This model will be of his plane – the Ruptured Duck.
If you are interested in reading the after action report on the raid by General Doolittle himself – GO HERE.
I have thus far painted and assembled the sections that make up the a/c interior. I’m now gluing them to the fuselage. I’ll take some pictures of the completed interior before I glue the fuselage together.
6-24-08
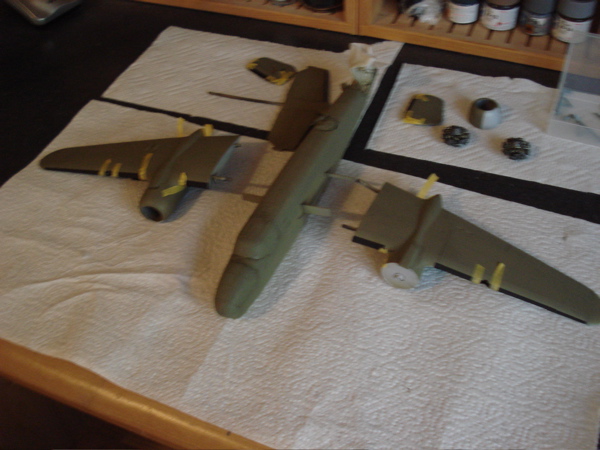
You might notice in the picture above (the one of the forward end of the fuselage) – that there is a plastic part just to the right of the cockpit (note – I have lost that pic in the server crash and the above pic doesn't show the part – so don't spend too much time looking for it – lol). That is part of the nose gear that had broken off. I thought I would just glue that back on using some brass wire to pin it. That would have worked if I had not wiped out the rest of the nose gear while I was sanding down the seams of the fuselage after I had glued the halves together! The two halves went together well and I used some Tamiya primer to fill in the seam gaps and used a wet sanding stick to sand that down. I will have to go back and restore the panel lines and rivet detail later with a scribing tool. While I was examining my handiwork I noticed that the nose gear was gone – oh well. Tomorrow I will send off a fax to Accurate Miniatures for a new nose gear part. That will come in a few days. I’m not going to glue that on till much later in the build as it is rather fragile.
6-29-08
I’ve assembled the front navigator/bombardier section and glued that on too. I had to use more Tamiya primer to fill the seams and rescribed lost detail in this area. I’ve also restored rivet detail in the seam areas that was lost. Next the tail sections were glued together and then the wings were assembled. They will need to be cleaned up and the seams sanded smooth. During all of this I realized that the bombsight had gone missing. That was an excuse to clean up my workroom until I found it lurking on the floor. That went into a small paper cup along with all of the rest of the small parts that had fallen/broken off.
7-6-08
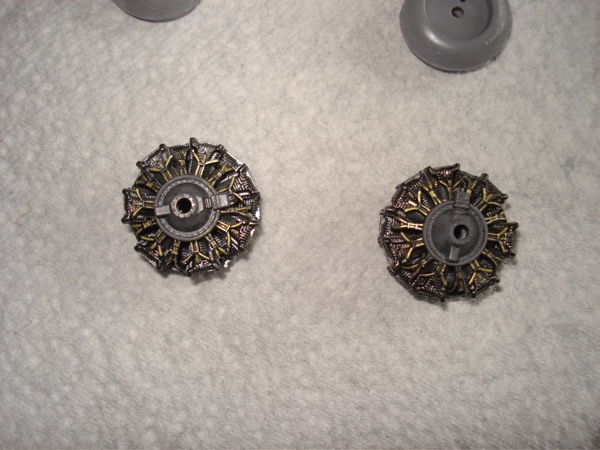
I’ve now assembled the engine nacelles and glued them to the wings. Some seam puttying had to be done on the wing bottoms where they meet the nacelles. All of the panel lines and rivet detail has been restored to the nacelles. I now have to clean up the nacelle/wing juncture. The engines have been assembled and given a coat of Tamiya gunmetal.
7-10-08
Received the new front landing gear and decal set from Accurate Miniatures. The decals date from 2006 and are a newer and more refined. I’ll use this sheet for the model. I’ve also sprayed the fuselage, wings, engine cowlings and tail with Tamiya fine primer to prep the model for painting and to revel any surface imperfections. Since this primer is an oil based paint I used Microscale Micro Mask (see pic):
I’ve had this bottle setting around for a while but have never used it because it isn’t recommended for water based paint. I figure that it will work here tho. I used it over most all of the fuselage windows because I found the supplied masks to be too large. It went on very easily with a paint brush. The only problem was I kept putting my fingers in the painted areas and had to clean up the smears. If the model masks for the cockpit and nose glass are too large I’ll use this stuff there too. I’ll just shoot the first coat in a dark green enamel to replicate the interior paint and then follow up with the olive drap top coat.
7-13-08
The fuselage and wings are now in an acceptable state with respect to their seams. The panel lines and revits and been restored using an eraser shield and a combination of an x-acto knife and a scribing tool. I’ve sprayed everything again with Tamiya fine primer to check everything. Next the larger clear parts – the canopy, nose, top turret, and rear canopy were dipped in Future and then left to dry on paper towels under a box to keep out dust. They came out really nice and clear. I had to drill a small hole in the nose glass to accept the forward machine gun. I then painted the top of the instrument cowling in the cockpit scale black and touched up the nose area with dark green. The nose area had their parts re-attached that had come off (seat and bomb-sight). Another small seat was glued in on the forward bulkhead in the nose and painted and the forward machine gun was stored under that. I then glued the cockpit canopy and the nose glass onto the fuselage using Arleene’s tacky glue. It dries clear. I’ve never used it for this before so we’ll see how it works out. Everything was set aside to dry before masking. I also reamed out the engine cowlings as these are too small. I opened them up about 1/16 inch to 3/4 inch. This should be more to scale.
7-14-08
The tacky glue seems to work fine – at least so far. The clear plastic seems to be holding fine. The canopy and nose glass were masked off using Micro Mask. I hope it will do the job as the supplied kit masks were just too large. I will be using acrylic paint (water based) and this it contraindicated for Micro Mask – so it will be interesting to see how it turns out. If it doesn’t I will have to order new clear parts and start over.
9-7-08
Sorry about the lapse – I’ve been busy with my youngest daughter’s wedding, vacation, and repainting the kitchen cabinets. Ok – to catch up – I’ve painted the main parts Model Master Light Ghost Grey on the bottom and Model Master Olive Drab on top. There were still several seam gaps that I’ve filled with Aleene’s Original Tacky Glue – it seems to do well for small gaps, but not for larger ones since it tends to run. It really can’t take the place of putty or CA. I’ve taken pics and if I can get them to load onto my computer I’ll post them. That’s all for now.
9-17-08
Ok- I’ve glued the wings and tail pieces onto the fuselage. I’ve also added the decals and painted the red danger stripe on – the decal silvered and painting was easier than fixing. I also installed the landing gear – almost finished. On to the pics;
9-20-08
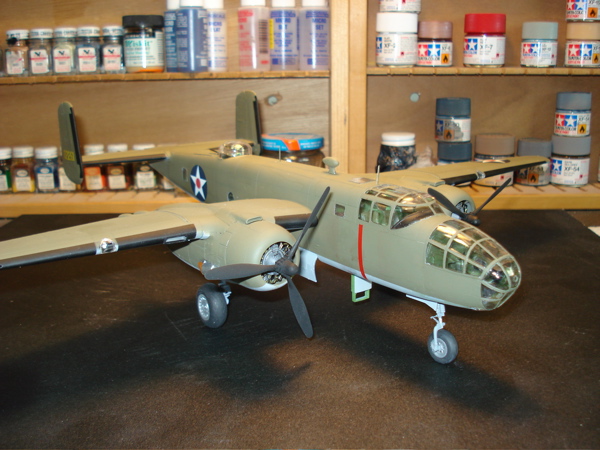
I’ve done some more seam filling between the tail and fuselage – then had to restore some panel lines. It looks better now. Then I had to respray that area. The Tamiya masking tape lifted up one of the stars on the fuselage side – I had spares tho. So that was fixed. Then I removed the Micro Mask on the clear bits and added the main gear doors and entrance ladders. I also re-glued the nose gear after it fell out. So this is what it looks like now:
10-18-08
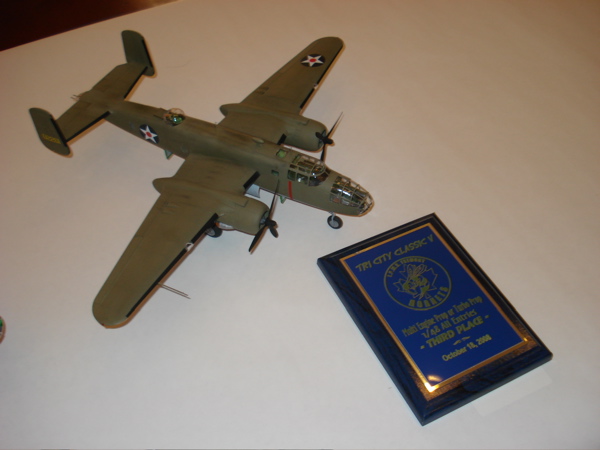
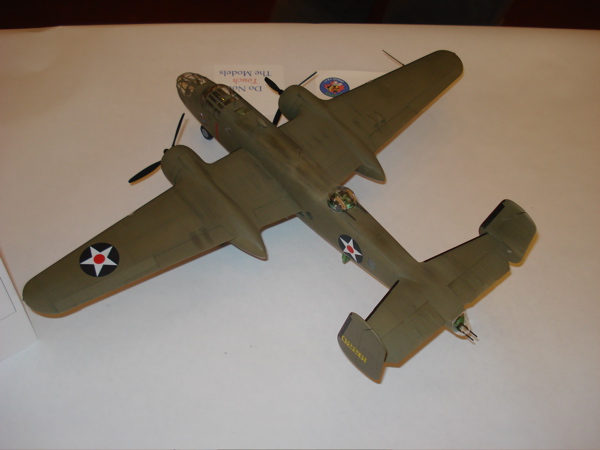
Well – at the Fremont Hornets model show today – the competition was stiff – but I managed to win a third place in it’s category for the B-25b. Following is the picture:
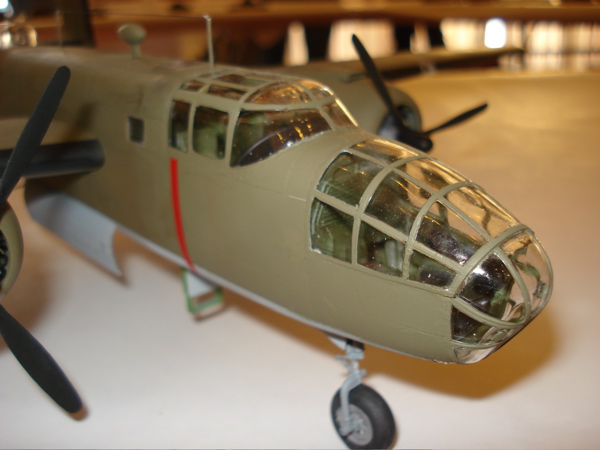
Here are some more pics:
