A good decal job can really make a model – and a bad decal job can – well it can make you want to file it in the wastebasket. Doing a good job in applying decals is something everyone can learn. Here are some tips I’ve picked up over the years.
I like to give the model (or at least the area where the decals are to be applied) a coat of Future Floor Polish. You can airbrush it on – or brush it on. When that’s dry you apply the decals – when they are dry cover the decal with another coat of Future. You can also put the decals on when the Future is wet but placement is more difficult because the Future hampers your ability to slide the decal around. This technique will give you a decal finish that looks painted on. Use of Future is really helpful on dull surfaces as it will make the surface shiny. Placement of the decal on a shiny surface helps to prevent what’s called silvering. Silvering has to do with the reflections of light at odd angles as you look at the decal. Silvering is not good – it really detracts from the scale appearance of the decal. You want it to look painted on just like the real thing.
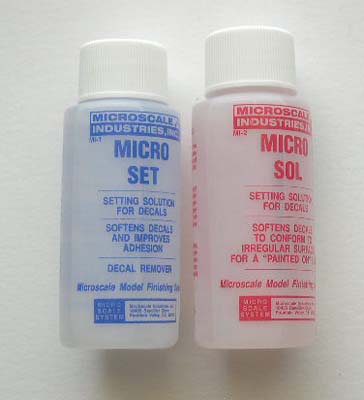
After you put the decal on and before you paint over it with Future you want to be sure it snuggles down to the surface and the contours of the model. To you this I use two products from Microscale – Micro-set and Micro-sol.
Micro-set helps the decal to snuggle down to the surface – and Micro-sol actually slightly dissolves the decal and makes it look wrinkled. Not to worry – as the decal dries the wrinkles disappear and the decal will look much better. I really like these products and use them with almost all of my decals. Be careful tho – the bottles are really tippy – I’ve knocked them over more than once.
Another tip in applying decals is to use really warm water to dip the decal in. This loosens the decal quickly and also softens the decal so it will lay down onto the surface better.
On two occasions I’ve had decals that I had problems with. The first was the Tamiya 1/48 Spitfire Mk Vb. The wing roundels just wouldn’t snuggle down properly – being the wild and crazy guy that I am I tried applying Tamiya liquid thin cement to the decals. I don’t recommend this as it will really dissolve the decals quickly – but it did the trick for me. Check out the writeup on this model to see the pics. The other occasion was just recently on the Trumpeter 1/16 T-34/85 Russian tank. Some decals on the turret had some silvering problems that I couldn’t get rid of. This was probably my own fault as I applied the decals to a pebbly flat turret surface in wet Future. I should have waited for it to dry so I could have a shiny surface for the decal to lay on. Well what’s done is done – so I applied Tamiya liquid thin cement to the silvered areas and that got rid of the problem. You have to just dab the cement on – don’t disturb the decal or you will really distort it as the cement will dissolve it quickly. And that’s not a good thing.
If your decals are yellowed – you can remove some of the yellowing by putting the decal sheet in a zip lok bag and taping it to a window with a southern exposure. The sunlight will help to remove the yellowing. I had this problem with the Tamiya 1/12 Ferrari 312T race car. I ended up buying a new set of decals as I couldn’t get the yellowing out – I guess they were too old. just one problem in buying an old kit.
3/10/2013 While building the Tamiya 1/32 P-51D I encountered the thickest decals ever. They looked nice and were in register, but they were really thick. I tried the following:
1 – Microscale set before laying down the decals – the surface is Alclad covered by Future.
2 – MIcroscale Sol – this helped but not enough
3 – white vinegar – the 5% solution I have isn't strong enough
4 – Tamiya extra thin cement – this also helped
5 – paint thinner – this in conjunction with the above seemed to do it.


