5-21-07
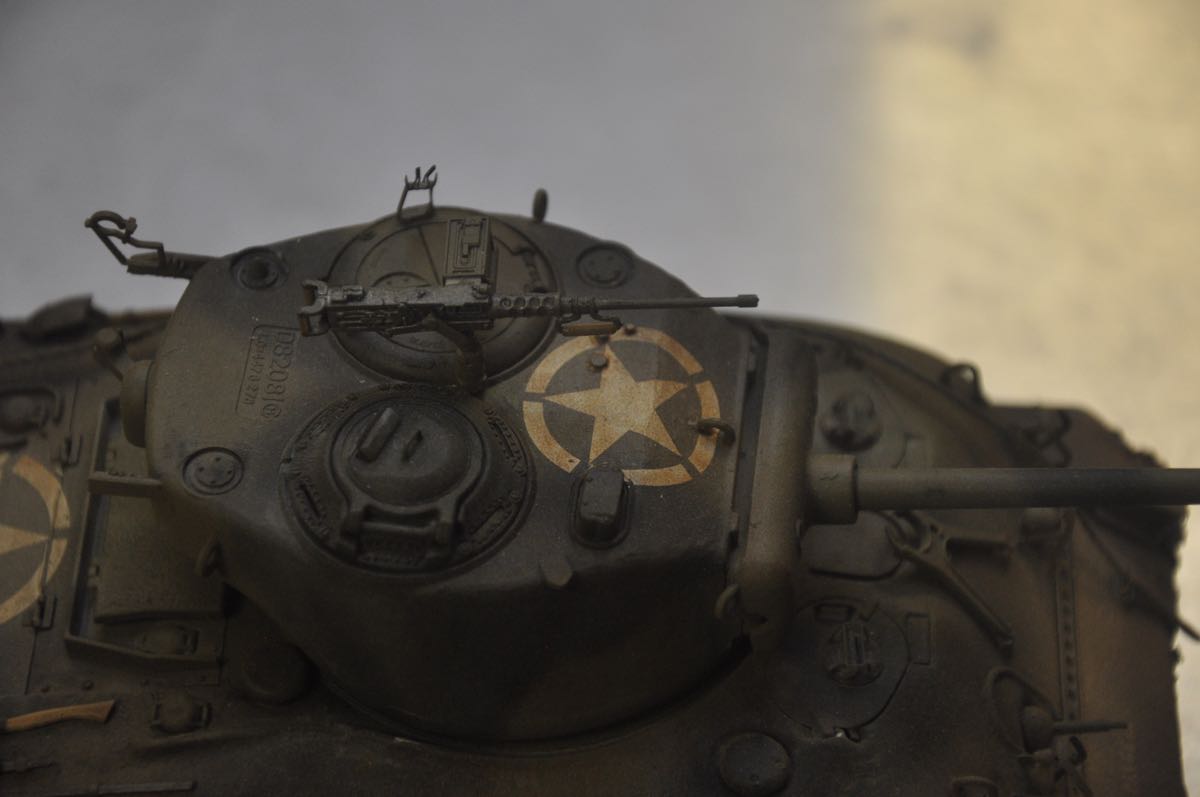
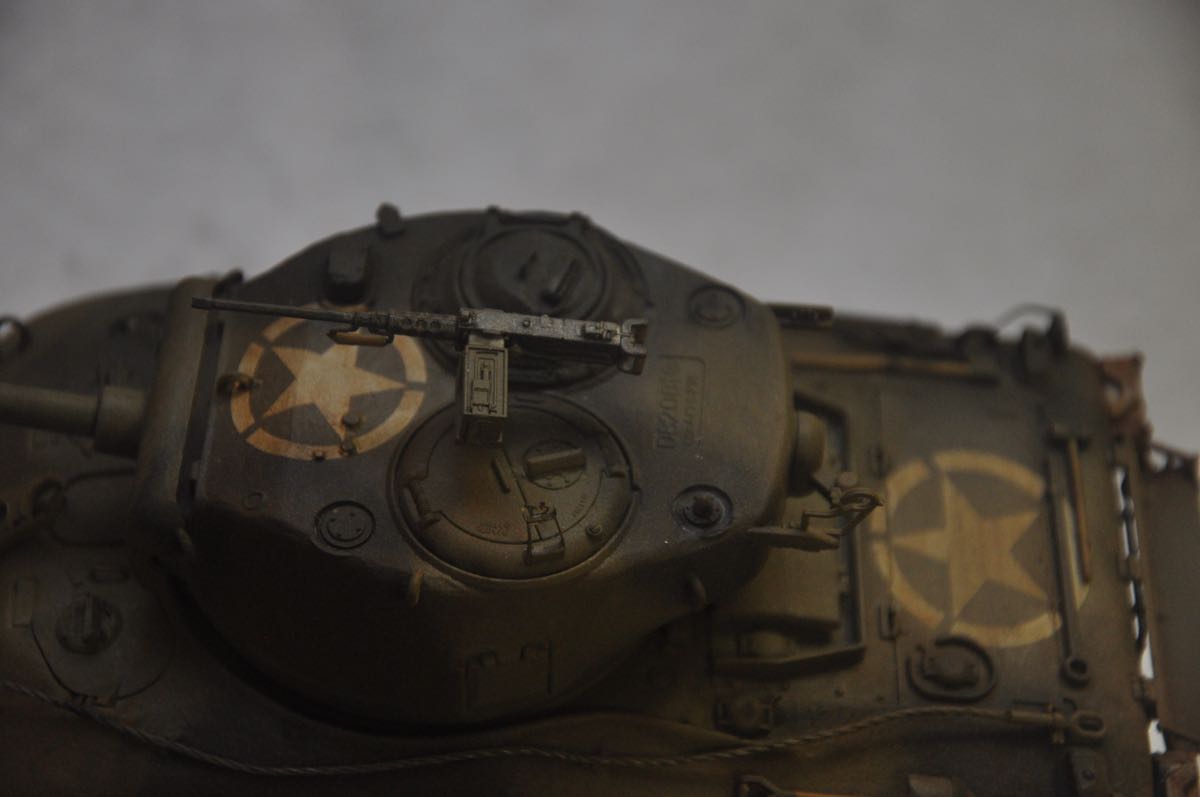
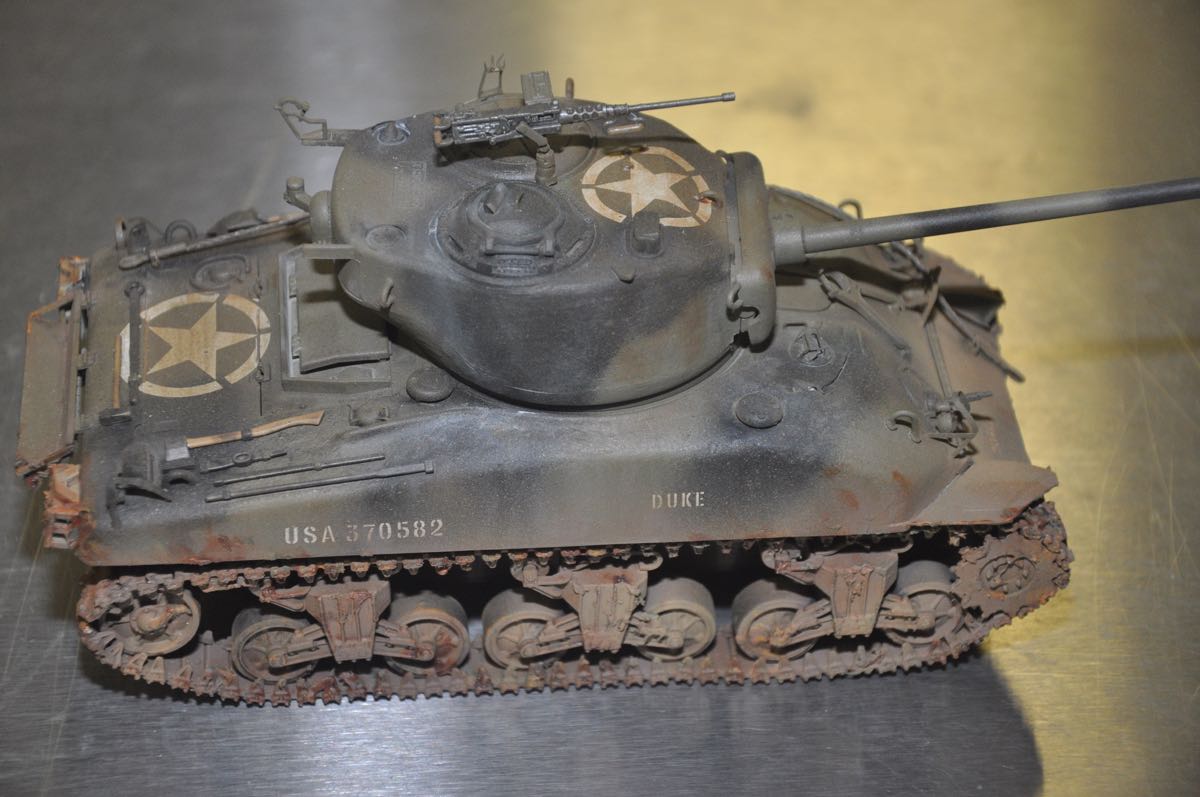
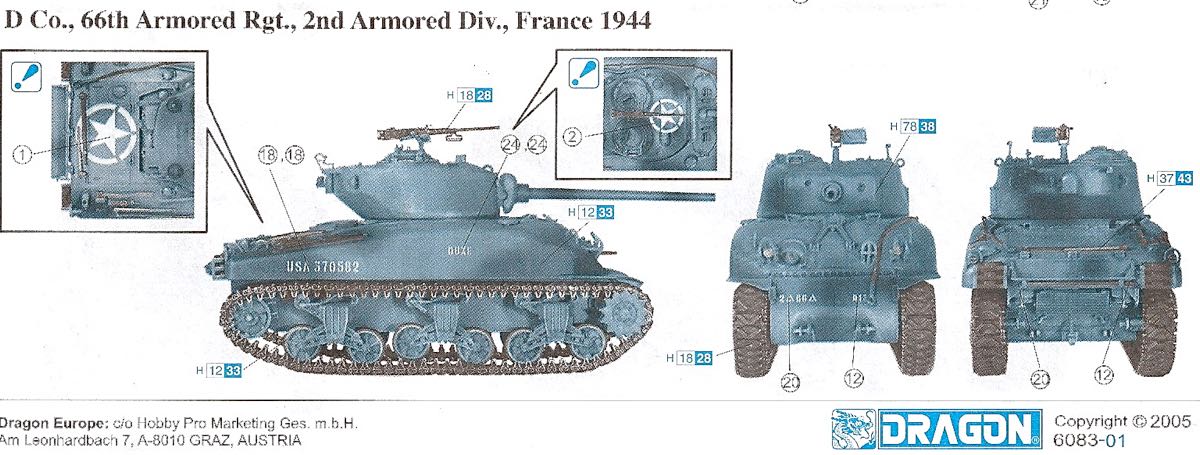
I won this model in the raffle at the April 14th, 2007 SCSM show at the Sunnyvale Convention Center. This was my first Dragon model (other than the Delta Figure) and I was immediately impressed with the detail and amount of parts in the box when I opened it. I haven’t built a tank in about 6 years so this was going to be fun. I was able to detail it with the included photo etch fret – very nice.
5-30-07
Ok – here are the latest pics – I think I’ve added everything in the kit except for the tracks. I need some steel paint to paint the tracks – I still don’t know if I’ll paint the tracks before I put them together or after – the whole affair is a bit tricky. I also still need to add some weathering and that will be done with some oil paints. I have since purchased some aftermarket tracks from AFV but haven’t got around to putting them on.


6-14-08
Woa – this has been a busy day – and I’ve also had time to get in a bit of modeling too. I have finished one set of AFV tracks – they are a bit fiddly but much easier to assemble and more detailed than the kit tracks. I assembled the tracks for one side and installed them on the tank – I’ll paint them in place. It’s just too much trouble to paint first and then install. I hope to finish the other set tomorrow. Stay tuned.
6-15-08
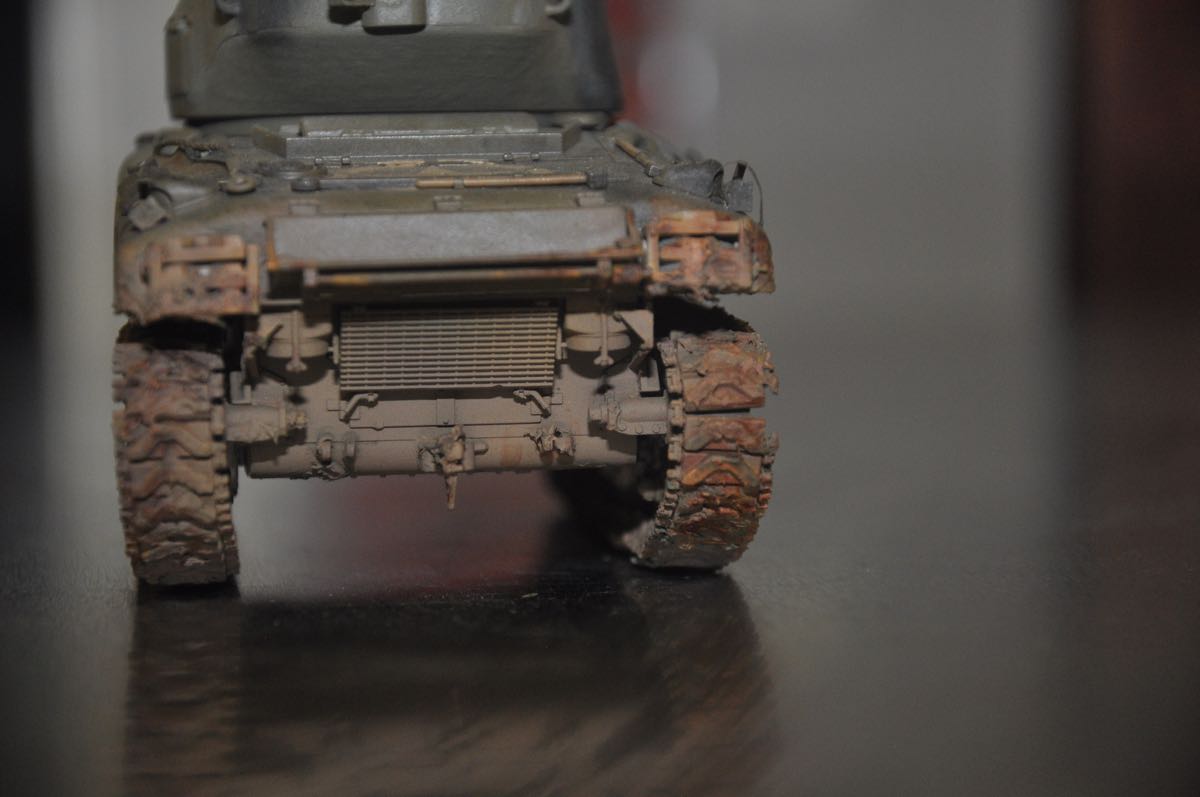
Ok – the tracks are done and I’ve done a little weathering.
6-16-08
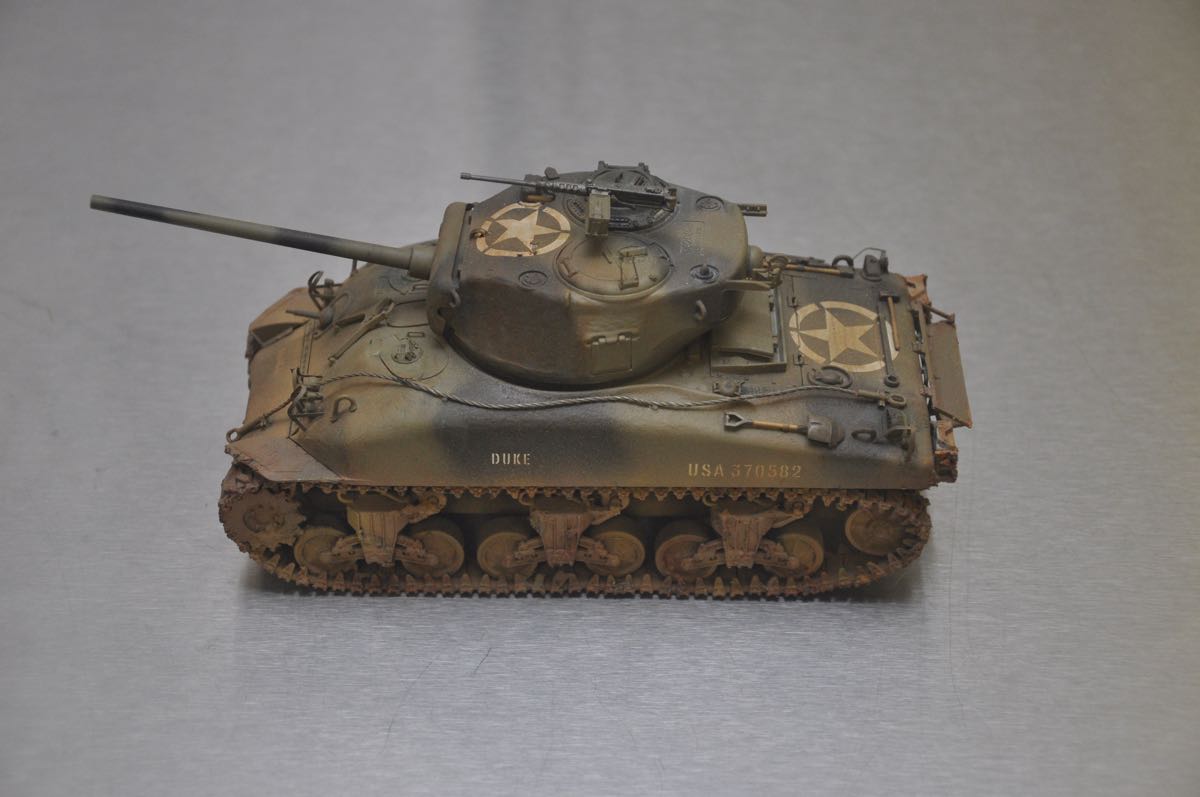
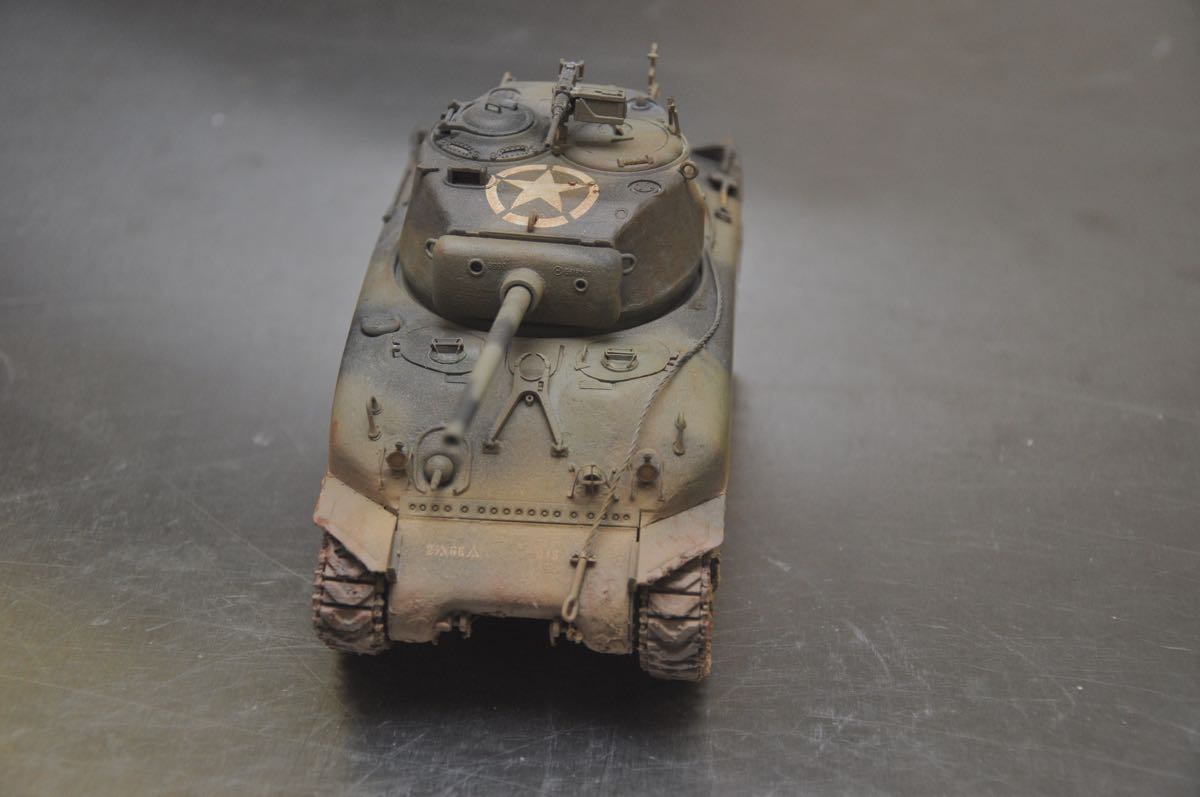
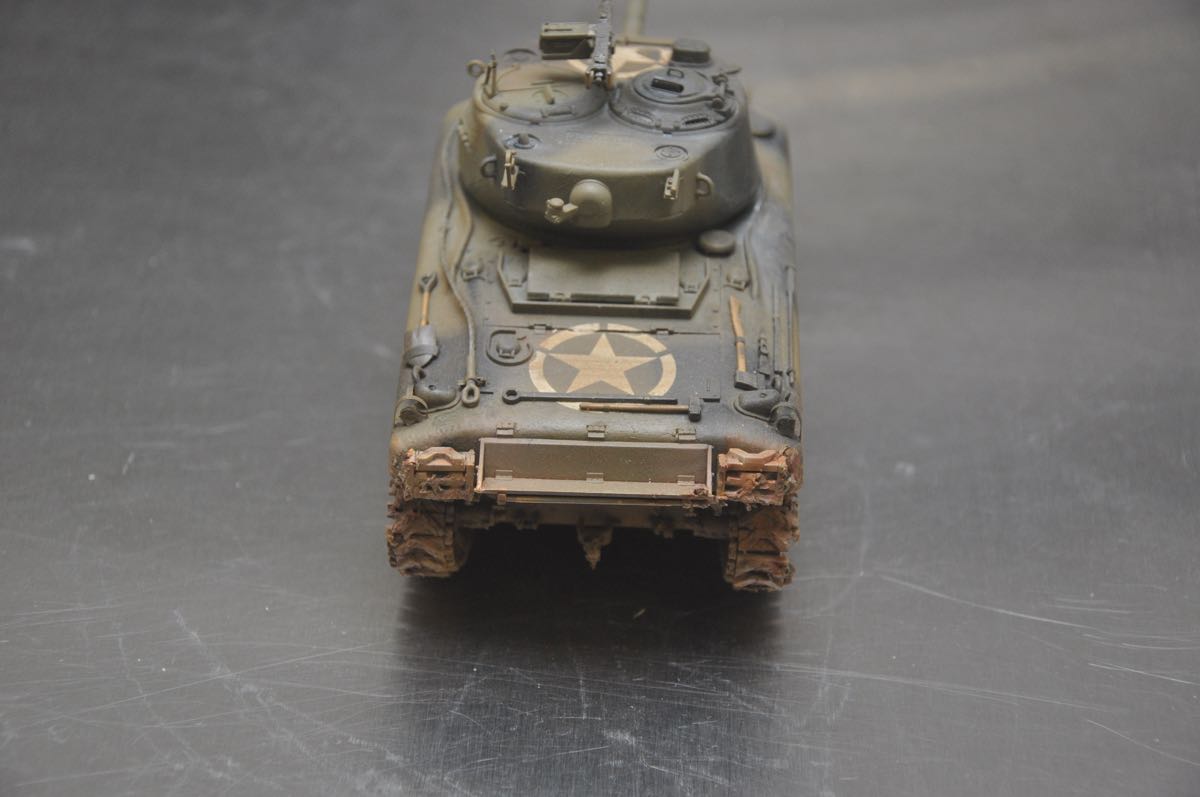
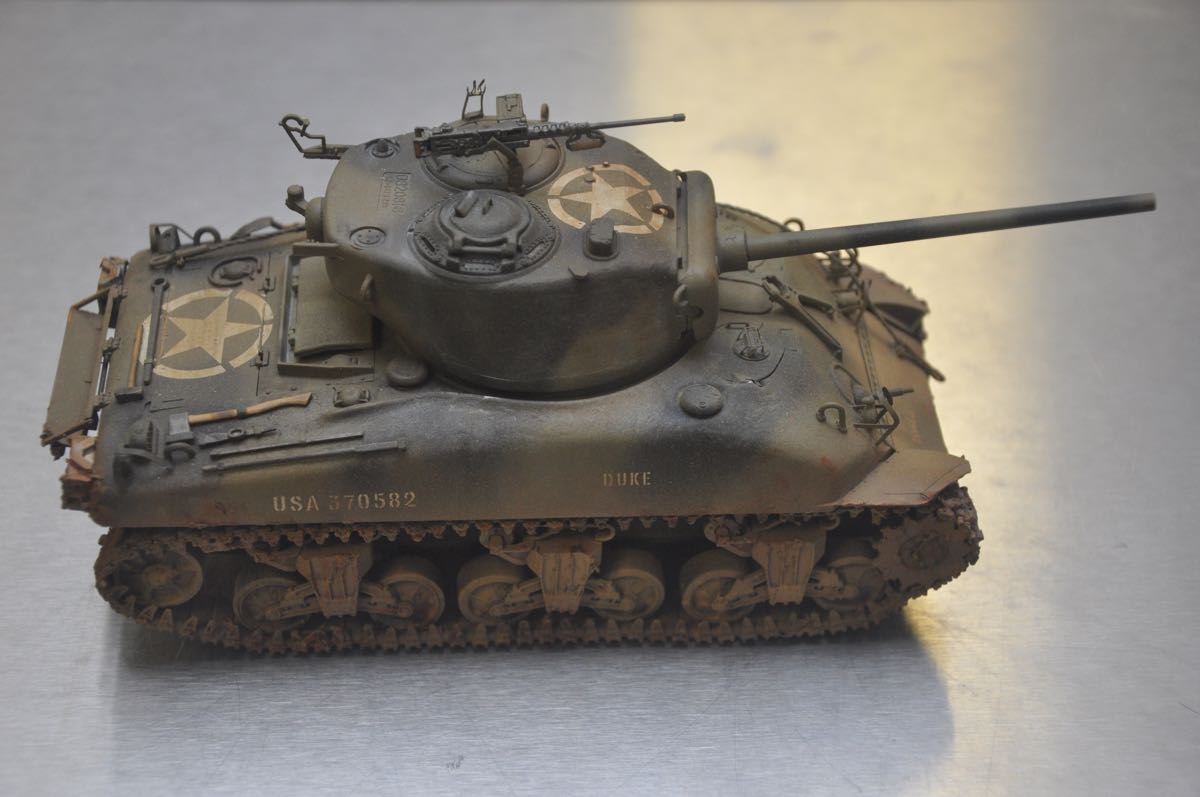
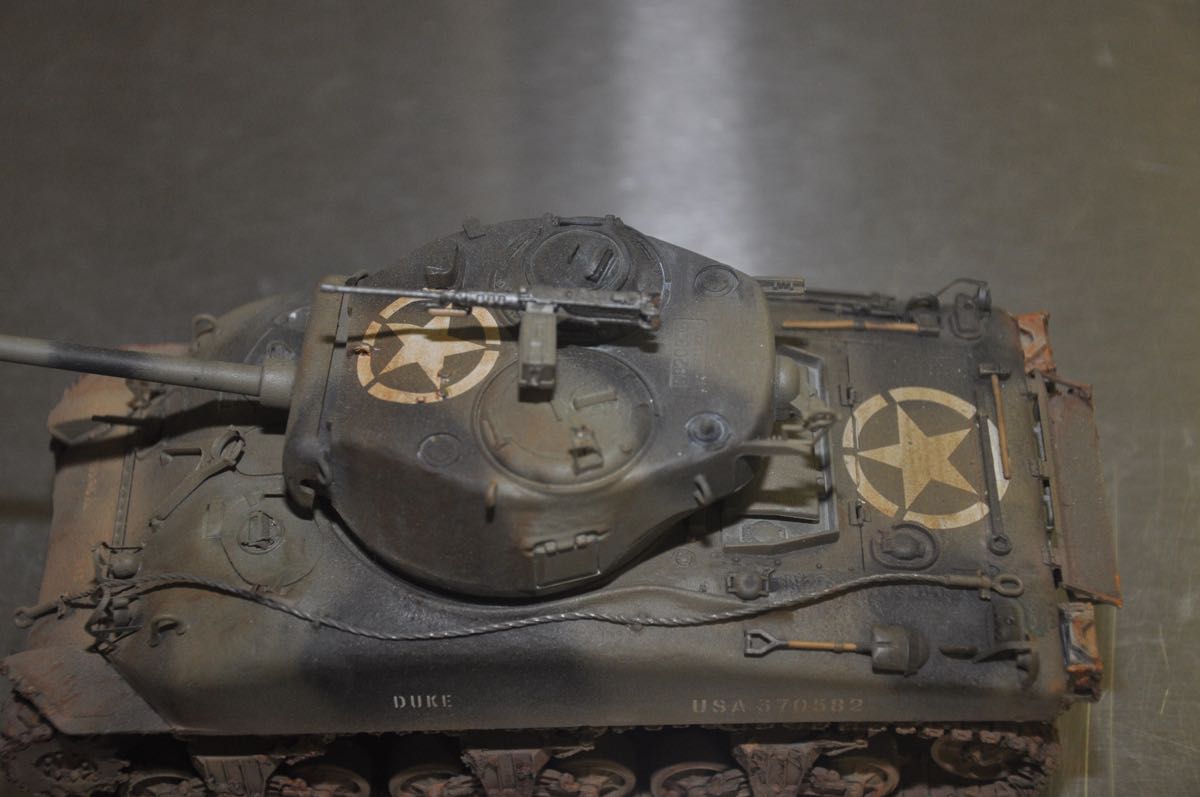
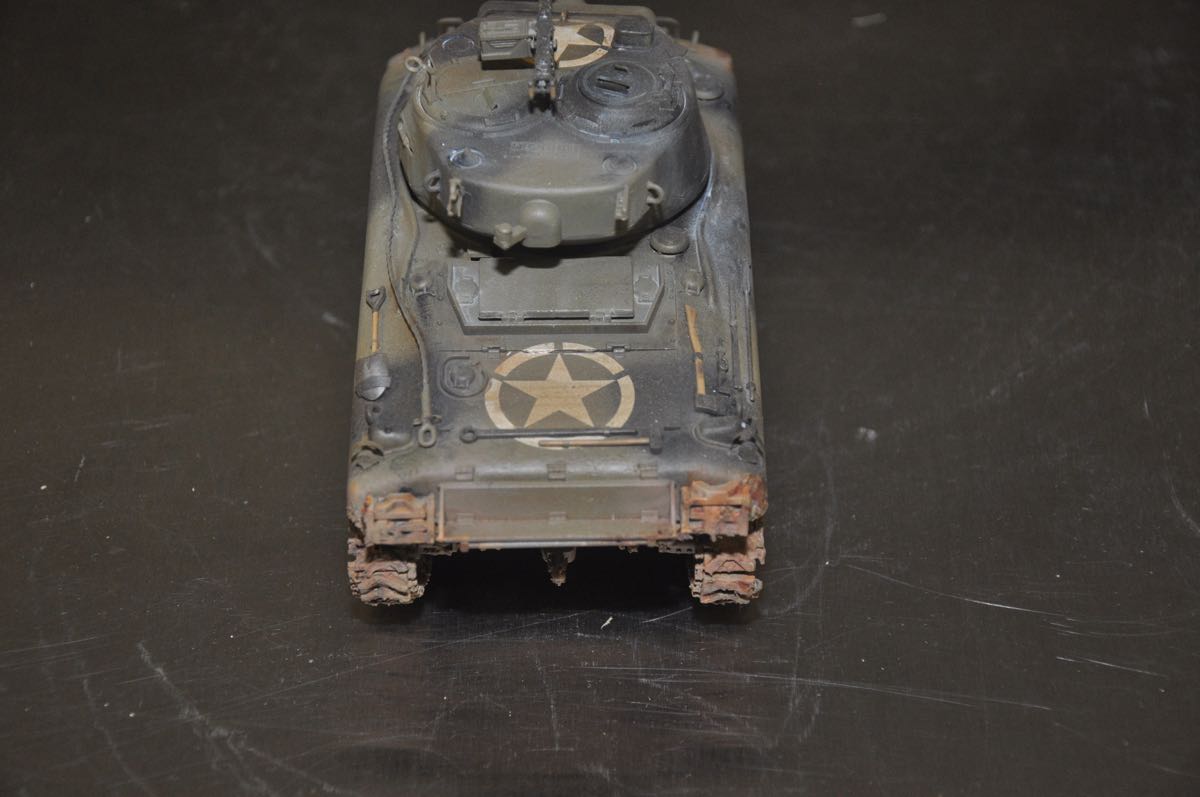
I added the spare tracks on the back and used Squadron Green Putty to simulate accumulated mud and dirt. I’ve never tried this before – it will be interesting to see out it comes out.
2-8-2015
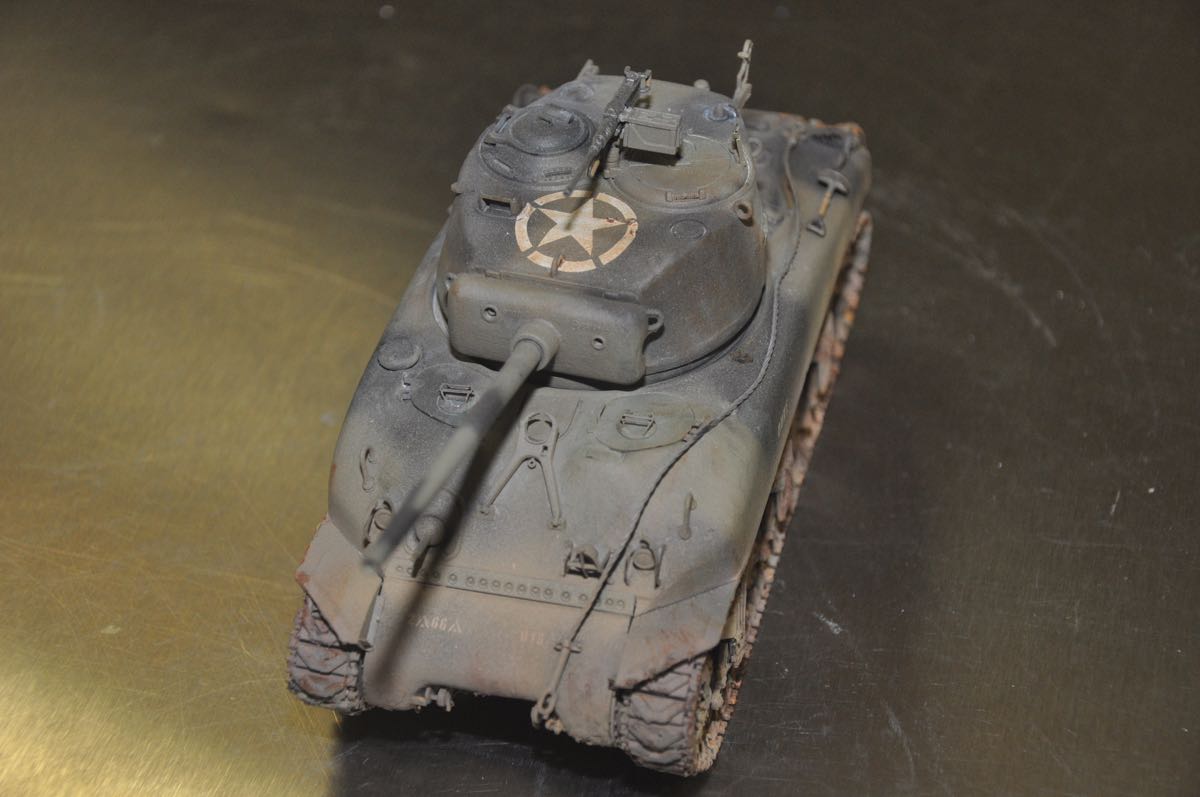
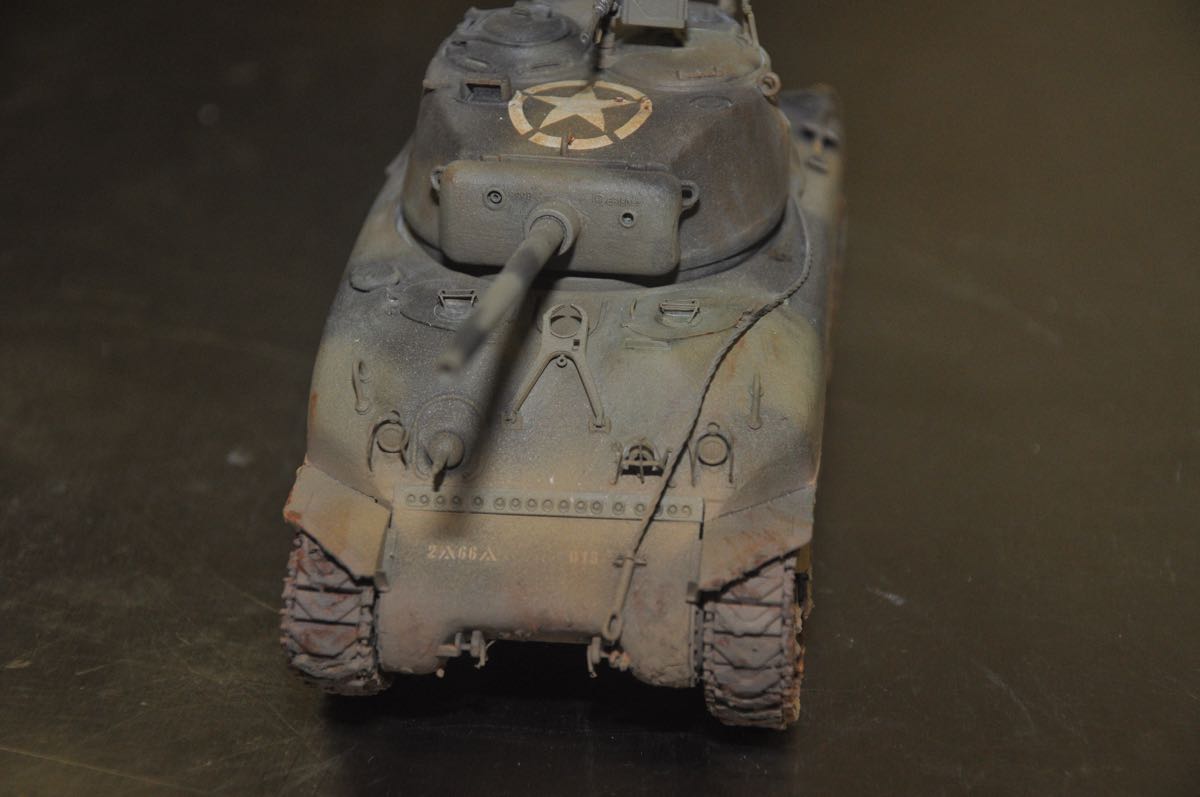
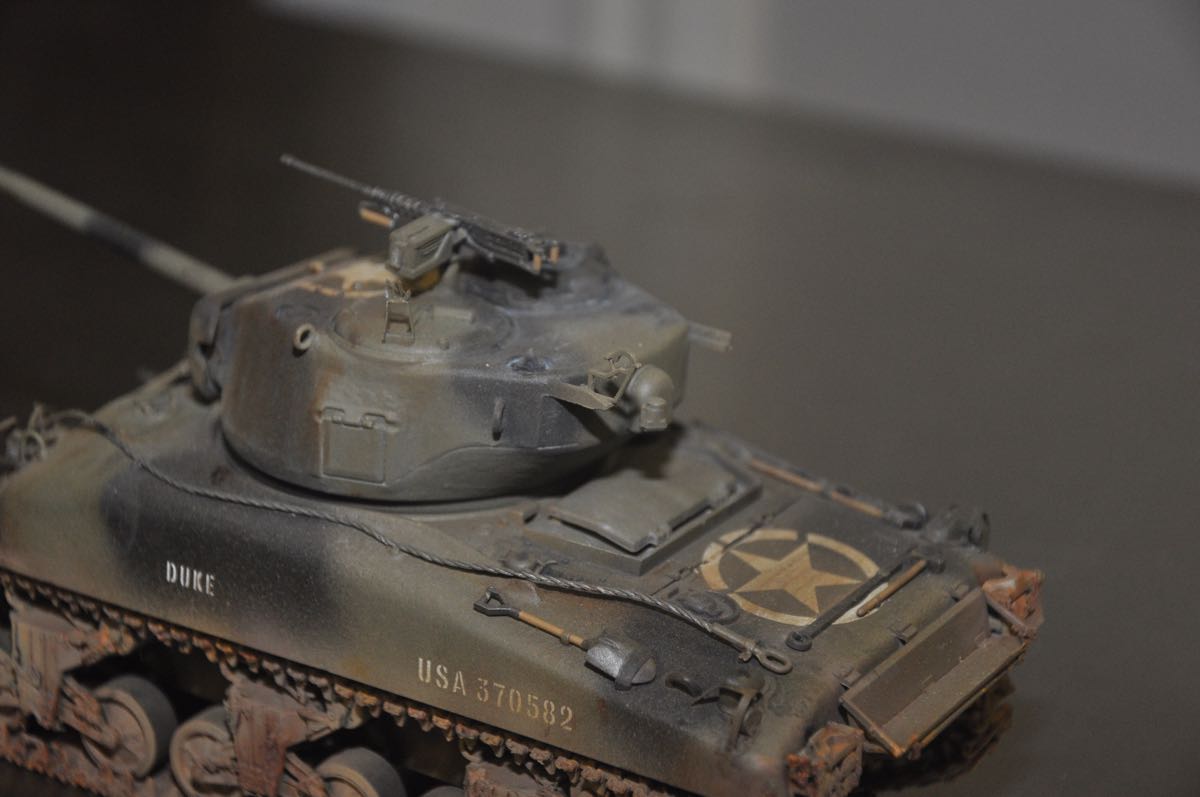
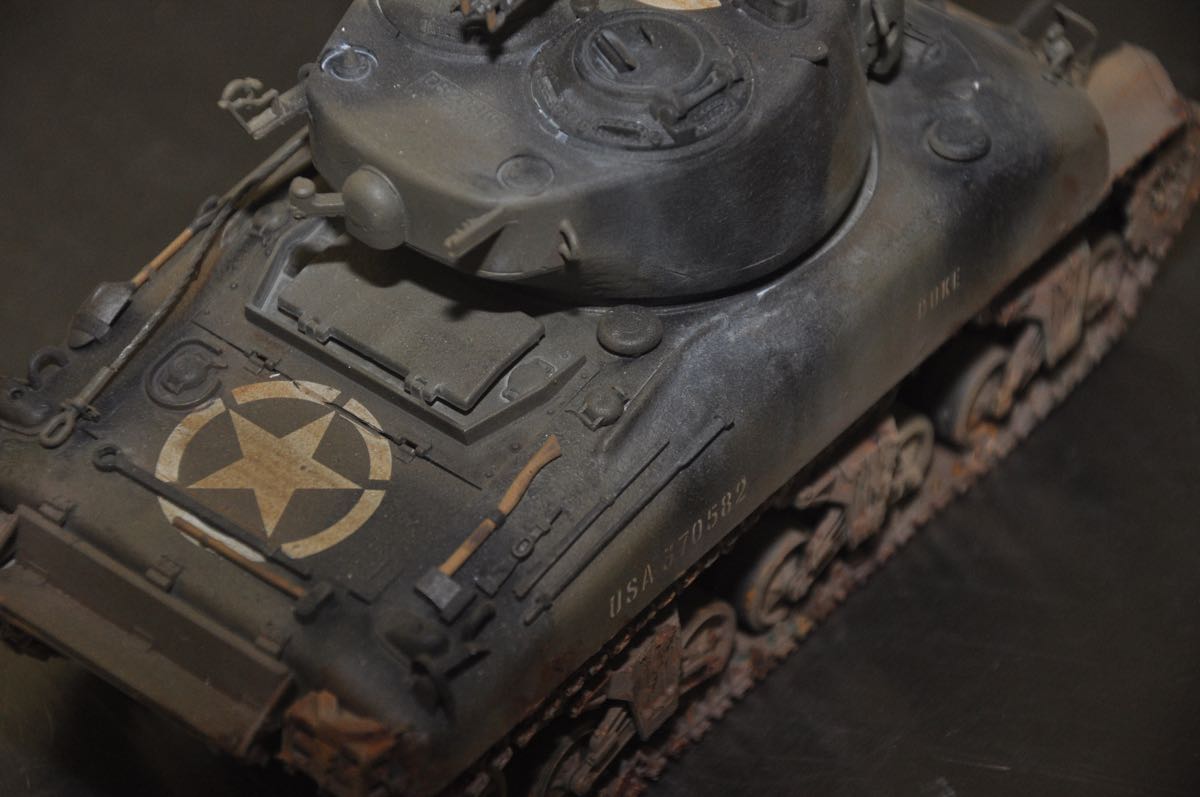
Here are some pictues of the Sherman in final form: