In August of 2010 I mentioned to my wife about this great model coming out by Trumpeter – the 1/200 scale model of the USS Arizona and that it was going to be a one time production. She said "why don't you order it?" So I did. Do I have a great wife or what?
Well I received it in the mail yesterday. As you can see from the picture it's big!! I'll be posting more info on it as time goes on. This one fantastic model tho – and will take a large amount of room to build – and a large amount of room to display. Truly a worthy and historical subject.
Now here is a little tidbit – my parents both grew up in small towns near each other in central Utah. They grew up with a guy who joined the Navy before WWII started. He was serving on the USS Arizona. The ship put in at San Francisco and he had leave so he went to visit his family in Utah. Well transportation being what it was he was late getting back to the ship and was listed as AWOL. The ship sailed for Hawaii before he got back on board so he was transferred to another spot (don't recall the details). Anyway – he was not on the ship on Dec 7, 1941 when the Japanese attacked even though he was still listed as being part of the crew. So for that reason his name is listed as lost in action on the marble plaque at the Arizona memorial. I just wish I could recall his name – I can't ask my parents either since they have both passed on.

This is the box it comes in – from Stevens International:

This is the box inside with a can of Campbell's soup to give it scale:

When you open the box this is what you see – it is very well packaged.

Starting with the long box on the top that contains the hull…


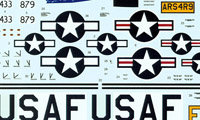
The long narrow box is next – it contains the instructions, painting guide illustration, and decals:

Under that the box on the left contains these parts:


This is the contents of the center box:

Finally this is the contents of the box on the right – it contains the clear parts (aircraft) as well as the photo etch and various other bits….

11/7/2010 A few observations on the Arizona – the model looks fantastic. There is no information however on where to place the railings, no detail on rigging the ship and the large color painting guide is pretty basic. I would have liked a little more information on detail painting and photo etch railing placement. That said I'm very pleased with the model. It will look fantastic next to my Nichimo 1/200 Yamato. You will defiantly need a case for this one – it's big. I should get the additional photo etch set in a few weeks. There are four sprues of 1/200 crew – unfortunately their poses leave a lot to be desired and the detail is not crisp at all. I won't be using them. As you can see in the above picture the main guns are provided in aluminum and have a recessed bore. All of the other barrels are in plastic and also have recessed bores. The additional photo etch set supplies all of the other barrels in brass which will be very nice. There were comments about the test shots of the model that were on the internet a few months ago. It seemed that the lower hull was longer or shorter (I forget) than the upper hull. That is not the case here – the upper hull and lower hulls match up perfectly. I haven't yet taken the hull out of the protective plastic – but I was still able to ascertain that the fit between the two is really excellent. I have a copy of "Battleship Arizona: An Illustrated History" by Paul Stillwell which is supposed to be a great source of information and detail for this model. It indeed has a great amount of information and a ton of photographs. I will need to determine if the Dec 7, 1941 version had red turret tops as is depicted on one side of the included color painting chart.
2/13/2011 I've taken about 50 more pictures of the kit and here they are…..


7/9/2011 I've received more photo etch – this is from White Ensign Models in England. I purchased the sets from Great Models. These look to be very nice and will really add a lot to the model. The instructions are the best I have seen for photo etch products!


7/30/2011 I have just received the crew for the Arizona – Preiser makes fantastic figure castings in many scales. I just found out that they make 1/200 scale figures too so I sent off for some. See the pics and judge for yourself. Of course these aren't a navy crew but with a little carving here and there and correct painting you won't know the difference. I used Preiser figures on my 1/200 Nichimo Yamato too – but there I used Z scale figures – that's 1/220 scale so they are all about 6 inches shorter. I couldn't find any 1/200 figures back then. Maybe that's ok since the Japanese are typically shorter. You certainly can't tell any difference on the model.


8/3/2011 I have just found a new website that is very interesting. It’s called SCALEDECKS.COM. They produce scale ship model decking in both wood and photographic paper and the deck for the 1/200 USS ARIZONA will be available in the next few weeks. The decking is reviewed in MODELWARSHIPS.COM and you can read more about it at these links:
https://www.shipmodels.info/mws_forum/viewtopic.php?f=53&t=77275
https://www.shipmodels.info/mws_forum/viewtopic.php?f=53&t=77976
They offer 4 finishes:Natural Teak, Natural Maple, Matte Photographic Paper and Tinted Wood.
The first two are actually a wood product. The decks don’t come with adheasive backing – you have to glue it yourself. The deck for the Arizona will be about $100. Kinda steep but you will get an amazing deck for it. I have no affiliation with this company – I just think their products are way cool.
Here is a pic of a Photographic Paper deck…

8/12/12 I just got back from the IPMS Nationals at DisneyWorld in Orlando. It was great. While there I got a deck for the Arizona from ArtwoxModel that I purchased from FreeTime Hobbies. I just couldn't wait any longer for the deck from SCALEDECKS to get completed. I also picked up a nice little reference booklet from RIVETCOUNTER. I will be posting the build as I go along. I have all of the pieces now to proceed.
8/14/12 I've been working on the hull as the pictures show. In one picture of a sprue notice in the upper left hand corner I've darkened the sprue identification letter to make it easier to see. There are a ton of sprues in this kit (actually 34) and this tip will be a real time saver. I've also taken a couple of pictues of the ArtwoxModel deck and instructions – these are fantastic and will really add a lot to the model. I've had to use some Tamiya Putty around the bow to smooth the seam out between the upper and lower hull parts. This may be my fault in not getting the best alignment that I could have.


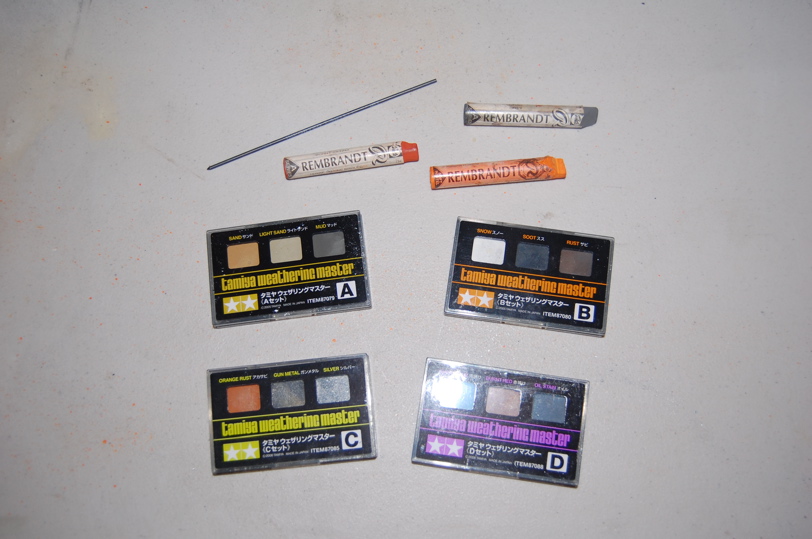
8/17/2012 I've finished the 5 inch guns. I was part way through before I realized that I had the brass barrels for them – lol. The plastic ones still look good though. I used Gator's Grip Acrylic Hobby Glue to attach the photo etch – much easier than using CA glue.

8/19/12 I've installed the inspection hatches and braces to the starboard side – the hatch locations were gathered from various pictures in Stillwell's book "Battleship Arizona".

8/20/12 I've installed the docking keels. The patterns are supplied with the White Ensign Model photo etch set. I used the photo etch as a pattern to cut the parts out from .040 inch plastic sheet and then glued them to the bottom hull.

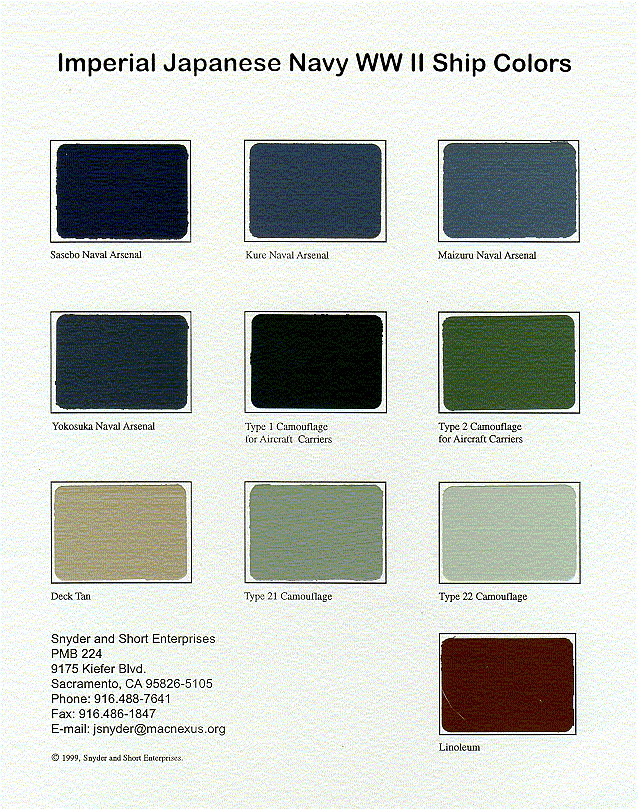
8/24/12 I've done a bit more. I've painted the hull, waterline stripe and the upper hull. The upper hull was sprayed with Tamiya Field Blue (XF-50). Upon comparison with the supplied color chart and the color pages from the Revitcounter book I felt that the color just wasn't right. I tried mixing the XF-50 with Tamiya Flat Blue (XF-8) but couldn't achieve a color match that way either. I finally ordered the correct Vallejo color "Dark Sea Gray" #898 from Spruebrothers along with the Vallejo airbrush thinner. That should arrive tomorrow. In the meantime I've done a little more with other bits – the aircraft catapult that sits on the aft deck as well as the one that sits on the aft turret. I've also done one of the aircraft dolleys – that one is a bit fiddly and I don't look forward to doing the other one! I've also included a pic of the 5 inch guns – again in the wrong color – oh well that will be corrected soon enough.


8/25/12 The Vallejo paint arrived today as will as the airbrush thinner (see picture below). It works quite well – I've painted the hull and some other bits the correct color – can you tell the difference? This stiff is just a little bluer and is darker than the reference color page that Trumpeter included. It's also darker than the color pictures in the Revitcounter Arizona book. I'm going to stick with this color – it looks good to me. I've also finished the crane that is mounted on the stern. I'm so glad that I have the Gator's Grip Acrylic Hobby Glue – this stiff is much much easier to use than CA and supplies enough adhesion to keep the parts stuck together. I hope over the long run the parts stay together – ha ha. The last picture shows the hull with the tape removed and the forward deck added. This deck is made by ArtworxModel out of China. It's really nicely detailed, but there are a couple of areas that keep popping up (it's self adhesive). I'll have to think about how to deal with that. I'm very pleased with the effect. Each deck has all of the model deck cutouts so they just lay right down on the existing deck without any problem. On to the pictures….


8/29/12 I'm including here some close-up photos of the deck, cranes, catapult and one turret so you can better see the detail….


9/6/12 I've finished all four of the main turrets. This photo shows them on the painting stand in the spray booth. I've just finished spraying them with Tamiya grey fine surface primer. Each turret needed 11 extra photo etch parts added to it – they were all glued on with the Gator Grip glue. I also had to remove all of the molded on railing on the tops as well as the ladders on the sides. I think the final result turned out pretty good. I've also added a pic of the first 50 foot motor boat with the photo etch.


9/30/12 I've finished the rear main mast as well as the ships boats. Here are the pictures….


Here are a couple more pictures – the finished forward mast and superstructure, and the bow area of the ship with fittings added. There is a lot of touch-up that still needs to be done.


10/21/12 I have been busy on the model – just not posting any pics. I have below pictures of the ship as she is now. Notice the life preservers on the ships boats. I made those out of plastic stir straws cut with fingernail clippers with white glue to make them donut like.


12/13/12 I have added some new pictures below that include some of the tarps that were on the ship on 12/7/41. The material I used is a very light paper like silkspan. I will shrink when brushed with liquid to form a tighter surface. I have yet to add the tarp on the bow area. I have also placed some of the crew under the tarps which might be seen here.


1/18/2013 I've added four more pics showing the added tarp on the bow, final rigging and the a/c (which it didn't carry on 12/7/41 – I know).


1/21/2013 After 5 months and 9 days the USS Arizona is finally finished. I've added the crew – made by Prieser. The guys in white are going on liberty, the guys in blue are staying aboard and the officers are in khaki. If you look closely you can see some of the crew pointing to the sky. They are in the initial moments where they are discovering that they are under attack by the Japanese. Many of the crew still aren't aware as their poses depict. Here are the final photos: